How To Prepare Quilt Binding
You’ve quilted your project and now you’re ready to button it up! Binding is the most common way to complete a quilt and adds a great finishing touch. Usually, cotton broadcloth is used for binding which is sold by the yard around 42” wide. Unless you are making a mini quilt smaller than 10” square you will need to piece your binding to fit your quilt. This is a guide to help you piece the perfect binding when using common quilting cottons.
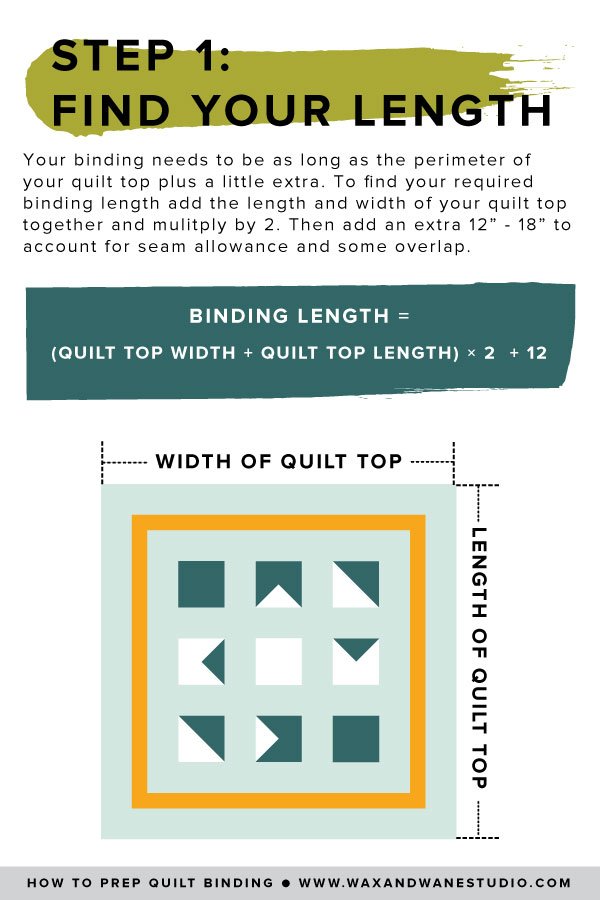
Step 1: Find Your Binding Length
First thing’s first - you want to make sure you have enough binding to wrap around the perimeter of your quilt, plus enough for seam allowances, turning corners, and some overlap. To find the perimeter of your quilt measure the width and length of your quilt and multiply by two. Once you know how much binding you need to wrap around the quilt you can use that number plus about 12” - 18” to figure out how much fabric to buy.
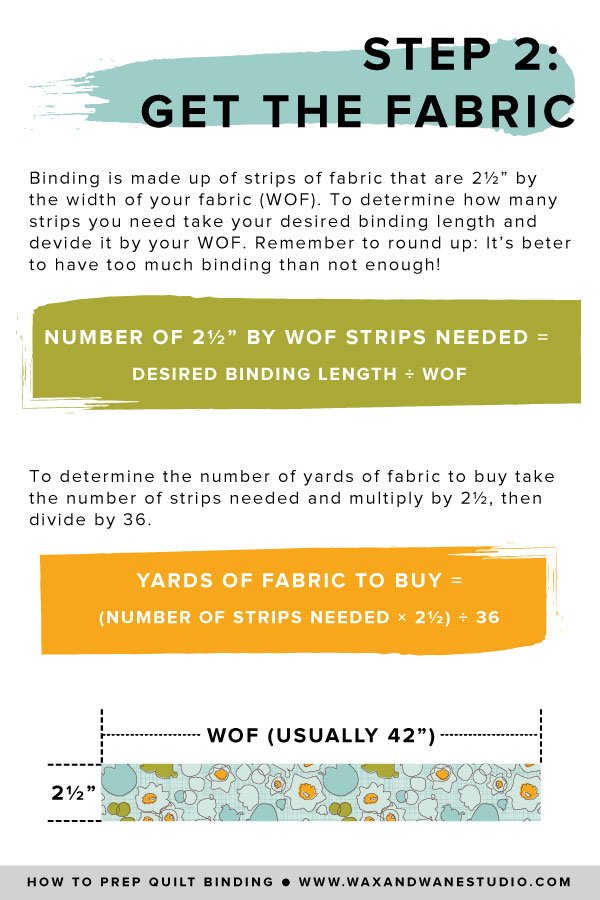
Step 2: Get the Binding Fabric
Binding can be made in many widths but the most common is made from 2½” strips of fabric. To figure out the number of 2½” strips you need take your desired length, in inches, and divide by the width of fabric (WOF - referring the measurement from selvedge to selvedge. Quilting cotton is usually 40”-45” wide.). If you end up with a fraction, round up to a whole number. It’s always better to have too much binding than not enough.
Once you know the number of strips you need you can determine the yardage of fabric to buy. Take the number of strips needed and multiply by 2½: this will give you the number of inches you need. Then divide that number by 36 (there are 36 inches in a yard) to find out how many yards to buy. Remember, if you end up with a fraction always round up!
Step 3: Cut and Piece the Binding Fabric
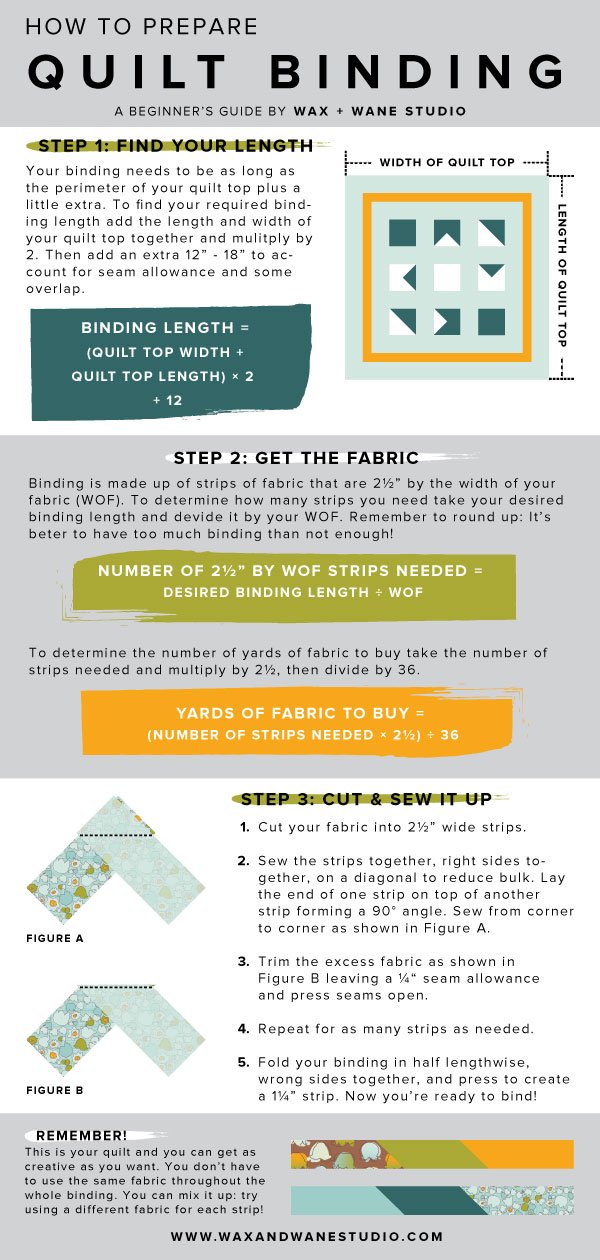
Once you have your fabric it’s time to slice it up into strips and sew ‘em up. Piecing your strips together on a diagonal will reduce bulk when it’s time to attach the binding to your quilt. Use the directions in the infographic below to create one continuous length of binding.
First, cut your fabric into 2½“ wide strips
Next, sew the strips together, right sides together, on a diagonal. Lay the end of one strip on top of another strip forming a 90 degree angle. Sew from corner to corner as show in the infographic below.
Then, trim the excess fabric, leaving a ¼” seam allowance and press seams open.
Repeat for as many strips of fabric needed.
Finally, fold your strip of binding fabric in half, wrong sides together, to turn your 2½ inch strip into a 1¼ inch strip
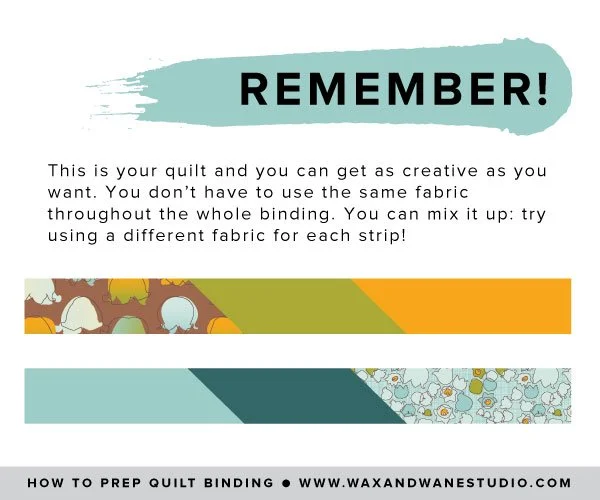
Don’t Forget!
This is your quilt and you can get as creative as you want. You con’t have to use the same fabric throughout the whole binding. You can mix it up: try using a different fabric for each strip!
You Know How to Mae Quilt Binding!
You did it! You prepared the perfect quilt binding so now you can finish that beautiful quilt. If you’re anything like me, you’re going to love the process and will be jumping to the next project as soon as possible. So, when you’re ready to create more binding, here’s a handy infographic with all the steps included in one place. Pin to share with your friends or save the image below for your future reference!
Dream it
〰️
Quilt it
〰️
Dream it 〰️ Quilt it 〰️
Free Hand Quilting Course
Learn the basics of hand quilting at your own pace, on your own time.
This course gives you the freedom to pull on the thread of your creativity or find peace in the structure of the known. Tap into a creative and de-stressing outlet and carve out time to work on yourself. With mindfulness as a foundation, you’ll make space for a creatively therapeutic practice that supports you in processing the emotions of an often too-heavy and too-busy world.


